New York Hudson Valley Autumn Hiking- Old Minnewaska Trail

Hudson Valley hiking Old Minnewaska Trail-24

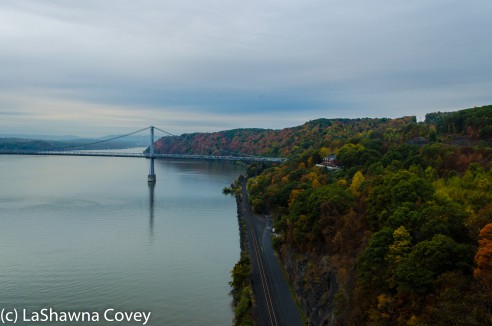
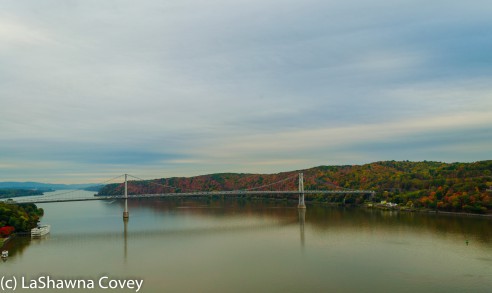
My last day in Hudson Valley was spent hiking. I started the morning off early with the Walkway Over the Hudson trail and then continued on further west to Minnewaska State Park. This hike was longer than the others I did, because I afforded myself more time, since all I planned on doing that day was hiking and then heading straight to the airport for an evening flight out.

Hudson Valley hiking Old Minnewaska Trail-3

Hudson Valley hiking Old Minnewaska Trail-11

It was fairly easy to get to Minnewaska State Park, though it is a bit of a drive.  From New Paltz, head west on Route 299.  Follow 299 until it dead ends into Rt. 44/55, where you’ll make a right turn.  Follow 44/55 past the hairpin turn under the Shawangunk cliffs and past the Trapps parking area on your right.  Continue another 3 miles past the Trapps parking area to find the well-marked entrance to Minnewaska State Park Preserve on your left.  Stop at the guard shack, pay the fee, then make an immediate right turn to make the short drive over to the Lake Awosting parking area, where you’ll leave your car.

Hudson Valley hiking Old Minnewaska Trail-4

Hudson Valley hiking Old Minnewaska Trail-5

I had planned on doing the Minnewaska Park trail as listed in Hike the Hudson Valley website. This particular hike was not just one trail, but a series of different trails designed to maximize your viewing opportunities in Minnewaska State Park. This trail was a 6.4 mile, sort of loop trail, with not too many hills (especially with the modified version of this hike I did).

Hudson Valley hiking Old Minnewaska Trail-7

Hudson Valley hiking Old Minnewaska Trail-8

The directions for this particular trail instructs to park your car at the parking area near Lake Awosting and then hike partway out on the Awosting Trail to view the Awosting Falls and then return and hike up the Orange Trail to Minnewaska Lake. The intention was to hike up the road all the way the Minnewaska Lake upper parking lot and then complete the rest of the hike from there. However, it slipped my mind where I was actually supposed to park, so I ended up driving up to the upper parking lot, and since I was already there, I decided to park and walk from there. For the most part, I shouldn’t have missed many beautiful sights, so I didn’t feel that I missed out on too much.

Hudson Valley hiking Old Minnewaska Trail-10

Hudson Valley hiking Old Minnewaska Trail-12

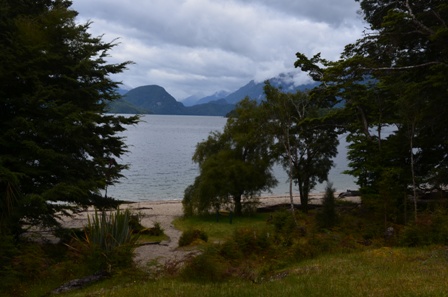
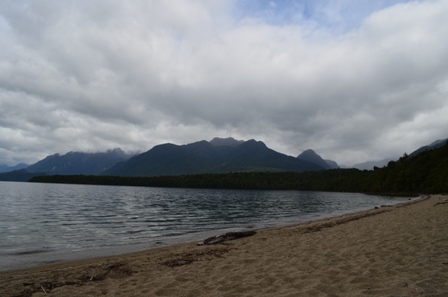
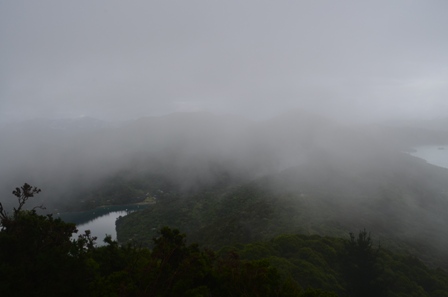
Once at the parking lot, I followed the rest of the hiking directions, and it was fairly straightforward. Of course I first had to take in the beautiful lake views, though the view wasn’t QUITE as beautiful as it could be, because it was cloudy and overcast that day. At least it wasn’t too crowded, since I was there on a Monday morning. The trails in this park are actually fairly well marked, with different colored signs indicating what trail you are following, along with the occasional posted map to see where you are.

Hudson Valley hiking Old Minnewaska Trail-26

Hudson Valley hiking Old Minnewaska Trail-1

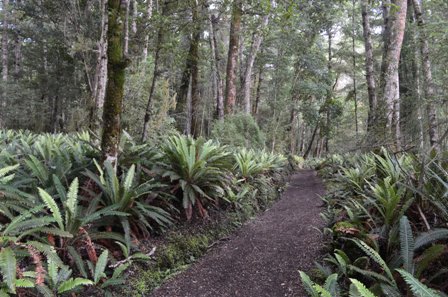
The first part of this hike was following the Red Trail down to the lake shore.

Hudson Valley hiking Old Minnewaska Trail-23

Hudson Valley hiking Old Minnewaska Trail-22

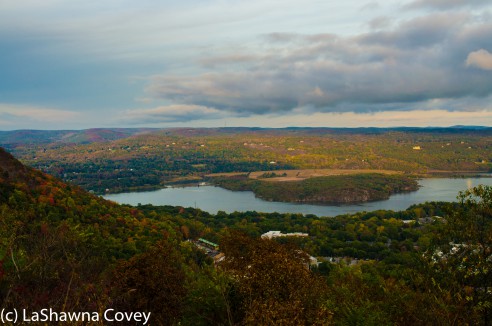
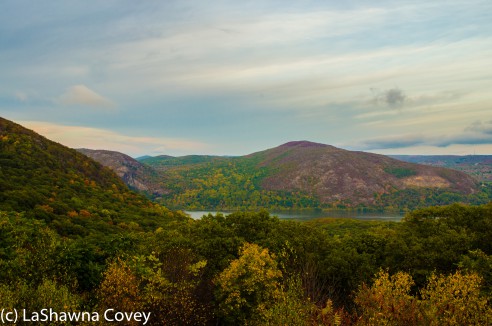
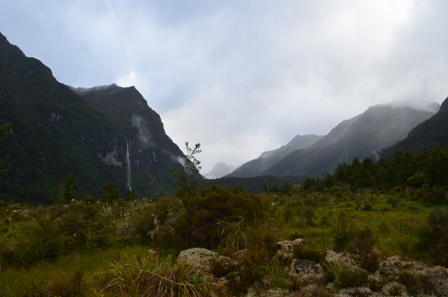
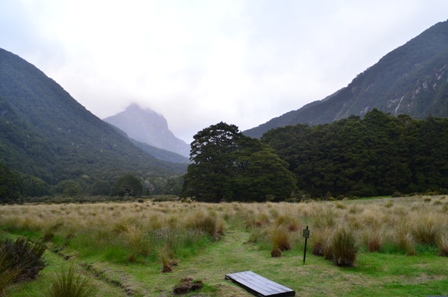
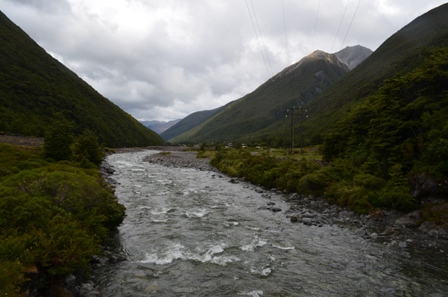
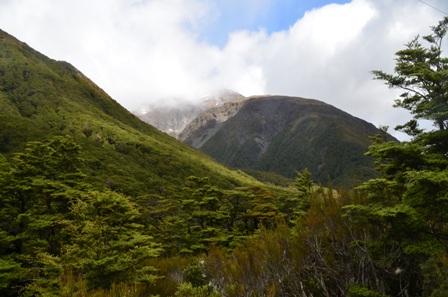
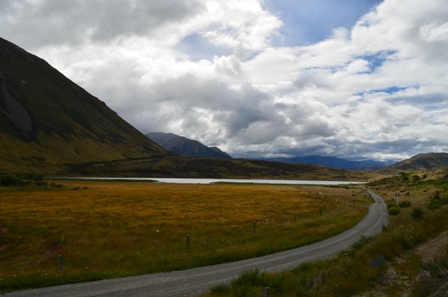
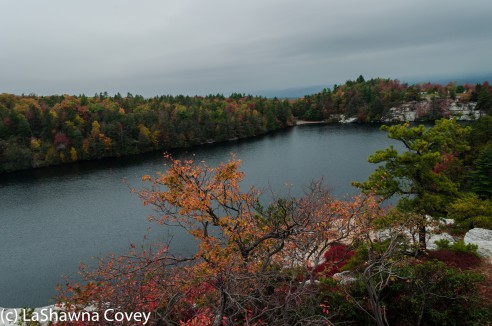
A few minutes on the Red Trail past the lake shore, I took a right on the blue sign-posted trail for the Castle Point Carriageway. This trail goes miles down the road, but this particular hike had me turn around at Kempton Ledge. Apparently back in the day, there was a very clearly marked sign. However, by now there is no sign, but you will pretty much know you are in the right place, because the view on the left side of the trail opens up into a panorama of the surrounding valley.

Hudson Valley hiking Old Minnewaska Trail-15

Hudson Valley hiking Old Minnewaska Trail-18

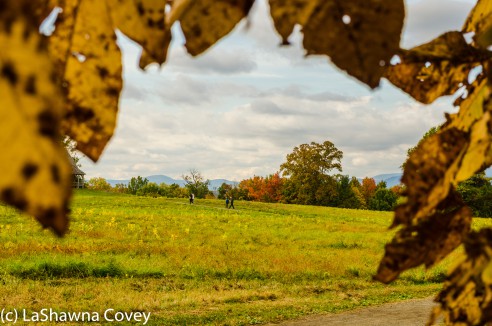
I was hiking in mid October, and it was pretty much peak autumn foliage. It was awe inspiring to see all the colors ablaze in front of me. It really looked like a pastel painting, and frankly this would be a perfect site for plein air painting.

Hudson Valley hiking Old Minnewaska Trail-25

After taking in the view for as long as I could, I turned back around the followed the Blue Trail back down to the Red Trail via the Yellow Trail, the Millbrook Mountain Carriageway.

Hudson Valley hiking Old Minnewaska Trail-13

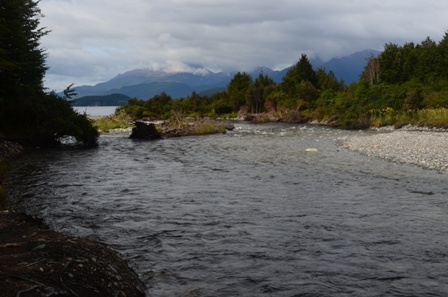
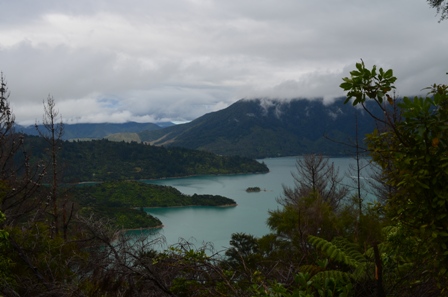
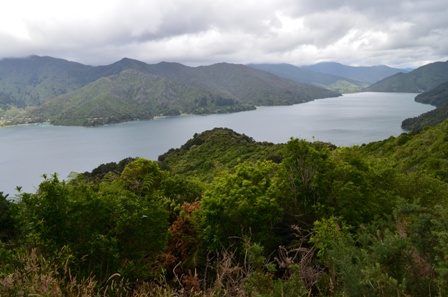
The Red Trail hugged the Minnewaska Lake and then eventually headed up the hill. I took a brief detour to another beautiful viewpoint (seriously, there are just so many beautiful views during this hike- as witnessed by the abundance of gorgeous fall photos in this post).

Hudson Valley hiking Old Minnewaska Trail-20

The Red Trail took me back to the parking lot overlooking Minnewaska Lake where I drove back down to the entrance to park in the Awosting Trail parking area. This allowed me to complete the first part of the hike I missed, because I went all the way up to the upper parking lot.

Hudson Valley hiking Old Minnewaska Trail-27

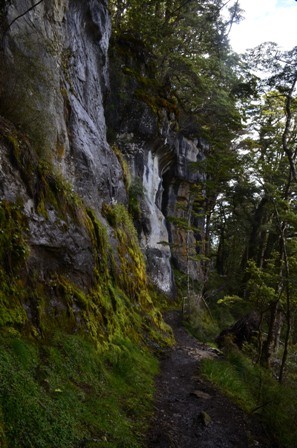
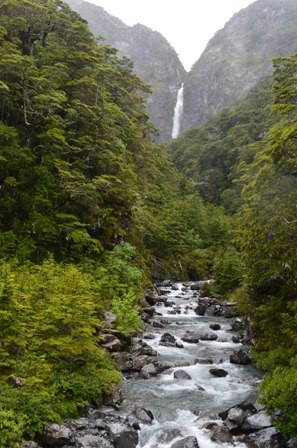
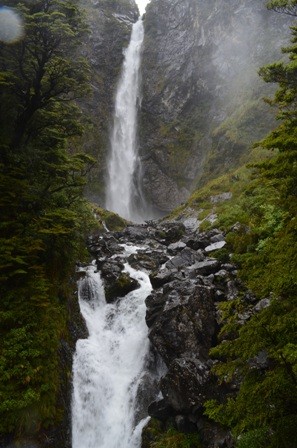
This walk was just part of the Awosting Trail and took me out to the overlook over the waterfall. I followed the trail down to the bottom of the waterfall, took in the nice view and then hiked back up to the parking area. It is only about a five/ten minute walk out to the top of the waterfall and about five more minutes to the bottom of the waterfall.

Hudson Valley hiking Old Minnewaska Trail-34

Hudson Valley hiking Old Minnewaska Trail-33

While this particular hike involves different trails in Minnewaska State Park, it is still fairly easy to follow. The different trails are fairly obviously marked with different colors. The views of beautiful nature and autumn foliage definitely make this trail worth it. If you hike the trail, it is pretty flat in most areas, with the only major hill from the Awosting Trail park area to the Minnewaska Lake upper parking lot, which I missed, because I missed the turn to the Awosting Trail parking area. Honestly, if you are pressed for time, or just aren’t a big fan of hills, you can easily drive to the upper parking lot and start the hike from there.

Hudson Valley hiking Old Minnewaska Trail-29

Hudson Valley hiking Old Minnewaska Trail-19

New York Hudson Valley Autumn Hiking- Poet’s Walk

Hudson Valley hiking Poet's Walk-9

Once I read about the Poet’s Walk hike, I just knew I had to fit it into my hiking schedule. It was a bit off the beaten path for my planned itinerary, but not so far off that I could not swing by and do this walk in the later afternoon.

Hudson Valley hiking Poet's Walk-4

Hudson Valley hiking Poet's Walk-11

This is a great and easy walk to do on a late sunny autumn afternoon, because you have an expansive view of the Hudson Valley, and can see the sunset if you want to wait that long (I didn’t). The trail is only about 2.4 miles if you do the entire loop trail, and flat or gentle hills most of the trail.

Hudson Valley hiking Poet's Walk-6

Getting there is pretty easy. From the intersection of Market St (Rt 308) and Rt 9 in the village of Rhinebeck, head north on Route 9.  In about five blocks, bear left onto Montgomery Road. Keep going straight and Montgomery Road becomes Mount Rutsen Road which becomes River Road (County Rd 103).  Take River Road for a few hundred yards and you’ll come to a stoplight at the intersection with 199.  Go straight here and find the well-marked Poet’s Walk parking lot on your left in about half a mile.

Hudson Valley hiking Poet's Walk-7

This is another one of those trails you can’t get lost. Park in the parking lot and follow the signs out to the trail. After a very short walk in a wooded area, you emerge into a wide open field and can see for quite a distance.

Hudson Valley hiking Poet's Walk-1

Hudson Valley hiking Poet's Walk-8

The first thing that caught my eye was beautifully designed gazebo off a short distance away. The gazebo is right on a tiny loop trail in the field and offers a very beautiful view of the Hudson Valley foliage and its elaborately designed gazebo.

Hudson Valley hiking Poet's Walk-2

Hudson Valley hiking Poet's Walk-3

There really isn’t much to this walk, except to enjoy the views from the many well-placed benches. There is a loop trail that takes you closer to the Hudson River, but once the loop takes you from the river, there isn’t much else notable to the walk, though the wooded views are nice and peaceful. While there were many people in the open field enjoying the view, there were much fewer people on the loop trail, so I practically had it to myself that time of day in the later afternoon.

Hudson Valley hiking Poet's Walk-10

Hudson Valley hiking Poet's Walk-5

I was glad that the weather held out and the afternoon light on the foliage provided some great autumn leaf peeping. This walk is super easy to do since it is basically strolling for the most part on an easy path (a tiny bit of rockiness if you walk the loop trail). But if you are in the area, it is certainly worth your time.

Hudson Valley hiking Poet's Walk-12

New York Hudson Valley Autumn Hiking- Walkway Over the Hudson


Hudson Valley hiking Walkway Over the Hudson-1

The Walkway Over the Hudson is one of those unbelievably easy walks, but offer tremendous views. The walk is literally what is says- a walk over the Hudson River, over a flat pedestrian bridge.

Hudson Valley hiking Walkway Over the Hudson-6


You can do this walk from the eastern side of the Hudson River starting on the Poughkeepsie trailhead or from the western side from the Highland trailhead. Either side is easily accessible for parking. I chose the western side, because I was going to go straight from this walk to another hike on the western side, so it was right on the way. From Rt 9W in Highland, take the first turn north of the Mid-Hudson Bridge exit onto Haviland Road (right turn if you’re heading north on Rt. 9W).  The entrance to the Walkway is on your left in less than a mile.Parking in the official lots of $5 USD, though there is other parking further away that doesn’t charge. But I figured, why not just pay so I am right at the trailhead (again, maximizing my hiking time).

Hudson Valley hiking Walkway Over the Hudson-4

I started relatively early in the morning around 8 am, since it was my last day in the Hudson Valley and I wanted to get all my hiking in before I had to head back to New York City and the airport. That particular morning wasn’t really sunny or anything, but at least it wasn’t raining, though the clouds did diminish the power of the autumn foliage colors a bit.

Hudson Valley hiking Walkway Over the Hudson-2

This is another one of those easy hikes where is it impossible to get lost. The entire trail consists of a pedestrian bridge that spans the Hudson River. If you walked the trail from end to end, it would be about 3 miles, though once you are not over the river, the view isn’t quite so majestic. It’s fine and all, but it’s nothing eye popping- just local neighborhoods, some of which have erected privacy screens so you can’t see into their homes (that’s how close part of this trail is to homes).

Hudson Valley hiking Walkway Over the Hudson-5

I certainly didn’t have the bridge to myself that morning, as there were other walkers, bikers and joggers, but at that hour, the crowds were at a minimum. The views were pretty great and expansive, and you can see for quite a ways up and down the river. The autumn foliage that lines the river was very bright and colorful in spots, and times I felt like I was looking at a beautiful pastel painting.

Hudson Valley hiking Walkway Over the Hudson-7

This is one of those walks that shouldn’t be missed. It’s easy, easily accessible and the views are worth it.

New York Hudson Valley Autumn Hiking- Kaaterskill Falls


Hudson Valley hiking Kaaterskill Falls-2

Last fall when I visited New York’s Hudson Valley, I planned on doing as much hiking as possible. Since the Hudson Valley is so beautiful in the autumn, I wanted to maximize my communing with nature time. The hardest part actually was choosing which hikes to do. I wanted hikes that gave me the most bang for my buck leaf peeping-wise, but I also didn’t want to JUST hike all weekend. I only had four days, and my travel list was long, and the more I read about the Hudson Valley, the longer it got.

Hudson Valley hiking Kaaterskill Falls-3

I found a really great website that laid out most, if not all, of the available hikes in the Hudson Valley. From there it was deciding which ones were closest to where I was staying-particularly in relation to all my other planned activities, which ones were relatively easy, and which ones offered great views. While I enjoy hiking, I was looking to keep MOST of my hikes to no more than two miles, which would allow me to complete multiple hikes and do all the other autumn activity I love so much.

Hudson Valley hiking Kaaterskill Falls-9


I chose to do the Kaaterskill Falls hike, because it was only 2.o miles round trip, not THAT far off my beaten path, and the website teased a huge waterfall. I am a sucker for waterfalls, so off I went.

Hudson Valley hiking Kaaterskill Falls-5

Kaaterskill Falls is off Route 23A, and it was a bit of a drive from the interstate. The road is two lane and well paved, though rather curvy out to the waterfall site. This particular hike is very popular, so it is a bit surprising there isn’t more convenient parking. There is a parking lot about .3 miles past the trailhead. Of course that means you need to walk along the road to get to the trailhead, though the drivers seemed to be used to all the hikers.

Hudson Valley hiking Kaaterskill Falls-6

So much about this hike reminded me of autumn hiking in Korea. The trail isn’t the best, though it is easy to follow. Basically you just walk from the trailhead  one half mile until you hit the falls. It really can’t be any simpler than that. However, the trail isn’t just some flat stroll in the park, but it is rather steep in parts and rocky in other parts. Definitely make sure you have some comfortable, sturdy shoes.

Hudson Valley hiking Kaaterskill Falls-7

But other aspects of this hike made me think I was in Korea. The whole valley, the waterfall, the autumn foliage, all of it looks very much like many of the places I hiked in Korea. It was almost uncanny in spots.

Hudson Valley hiking Kaaterskill Falls-8

Once you get to the falls, you will see a yellow sign telling you to go no further. While people in the past have climbed up to the top of the falls, it is definitely not recommended, because it can be very dangerous and people have fallen to their deaths over the years. In response to that, new fencing has been put up to prevent people from hiking past the yellow sign.


While I can be a risk taker in some aspects of my life, I tend to be pretty safety conscious and try not to risk my life and limb on stuff like this, particularly since falling and breaking a limb (or dying) would have put a serious crimp into the rest of my autumn weekend plans. So I enjoyed the view of the falls from the bottom, and turned around and walked back to the trailhead. Again impossible to get lost.

Hudson Valley hiking Kaaterskill Falls-1


The entire hike only took me around 1.5 hours and that included time to relax and enjoy the view at the bottom of the falls. Like I said, the hike to the falls from the trailhead is only .5 miles, though that length is a bit deceptive due to the challenging nature of the trail in parts. But if you are used to any sort of hiking and in moderate fitness, it really shouldn’t be a problem. Definitely expect crowds, particularly in the fall. I went later on a weekend afternoon, and while the falls weren’t overrun with people, I certainly did not have the place to myself. But if you like beautiful nature, particularly in autumn, and love waterfalls, this is a good hike for you.

Hudson Valley hiking Kaaterskill Falls-4

Jirisan Baraebong Royal Azalea Hike


Jirisan Baraebong Royal Azalea Hik-15

A couple weekends ago, I finally was able to go on the Baraebong Peak Royal Azalea hike in Jirisan National Park. I read about this hike last year, but wasn’t able to do the hike. Since this year is my last spring in Korea, I knew I really needed to do this, because the pictures I’ve seen of this hike are absolutely beautiful. Luckily for me, in my online searches about this hike, I discovered the Seoul Meetup group that was planning to do this hike, and I eagerly signed up.

Jirisan Baraebong Royal Azalea Hik-1

After signing up, I realized that the hike the meetup group does, is only a short version of the hike. The true hike is the Jeongnyeonchi Hill Baraebong Peak Course. It starts at the Jeongnyeonchi service area and ends at Undong village. That hike is about 12.6 kilometers, and most of it traverses a ridgeline and passes through numerous passes that are covered in colorful azaleas. Unlike most hikes I have done in Korea, that hike has very little in the way of steep inclines, and the one steep decline is at the end of the hike.

Jirisan Baraebong Royal Azalea Hik-2

Jirisan Baraebong Royal Azalea Hik-8

The shorter hike we did started at Undong village and continued up the hill to Baraebong Peak with a diversion to Pallangchi Pass, with a return to Undong village. The hike we did was around 8 kilometers. This hike was also the steepest part of the whole hike. The hike starts at Undong village and ascends sharply to Baraebong Samgeori. The altitude gain on this hike was over 400 meters in a brief period of time.

Jirisan Baraebong Royal Azalea Hik-3

Jirisan Baraebong Royal Azalea Hik-9

I was definitely feeling the hike in my legs. It was in the middle of the day, and the sun was bright and overhead. There was only minimal shade on this hike, but I took advantage of it whenever I could. Surprisingly, all of these spring hikes I’ve done this year have felt easier than the fall hikes I did. I’ve actually been passing Korean hikers on the paths. My knees certainly feel better. I would like to think that I am simply fitter now than I was in the fall. Or maybe I am just missing all the fitter Korean hikers. But the more likely answer is that I’ve been hiking on easier paths. Sure, the trails are steep, but the trails are wide and surprisingly well-benched. At times I even felt like I was hiking in New Zealand.

Jirisan Baraebong Royal Azalea Hik-4

Jirisan Baraebong Royal Azalea Hik-10

This hike is very popular, particularly this time of the year. There were scores of tour buses at Undong village, and even more groups hiking in from Jeongnyeonchi pass. This popularity is probably why the trail is so well benched, but it also means it is VERY crowded.

Jirisan Baraebong Royal Azalea Hik-12

Jirisan Baraebong Royal Azalea Hik-13

For most of the trail, that is not really that big of a deal, but parts of the trail around Pallangchi pass are rather narrow, so there were times a long line formed on the trail. Sure that make the walking slower, but this also allowed a greater opportunity to take in the beautiful azaleas.

Jirisan Baraebong Royal Azalea Hik-5

Jirisan Baraebong Royal Azalea Hik-14

The azaleas at lower altitudes already passed their blooming season, but as I ascended in altitude, there were more and more azaleas on the path.

Jirisan Baraebong Royal Azalea Hik-19

Jirisan Baraebong Royal Azalea Hik-16

Once I reached Baraebong Samegori, I ascended to the top of the peak. Most of the trail was relatively flat, but the last 250 meters before hitting the peak were so steep, but the view from the top was worth it. I could see all the surrounding mountains, and I could see further down the trail, where the patches of azaleas were abundant around Pallangchi pass. I had plenty of time before having to return to the bus, so it was a pretty easy walk out to the pass.

Jirisan Baraebong Royal Azalea Hik-6

Pallangchi pass was definitely worth the walk. All around the areas were thousands of bright purple azalea flowers. The hills were fields of pink, and I had never seen anything quite like it.

Jirisan Baraebong Royal Azalea Hik-7

Independent travel for this hike is not exceptionally easy or cheap, but it is doable. The quickest way is probably to take a train from Yongsan to Namwon station, and then a taxi to Jeongnyeonchi service area. At the end of the hike at Undong village, there were plenty of taxis waiting, to get a ride back to Namwon station. There really aren’t any buses in the area, so you really have to take a taxi or be part of a tour group.

Jirisan Baraebong Royal Azalea Hik-11

If you have the opportunity to do this hike, I highly recommend it. I have never run into the opportunity to do a hike that afforded an opportunity to see so many wild, colorful azaleas in one place. Parts of the hills were all pink, and even the parts that aren’t, offer up so many beautiful views of the surrounding Jirisan National Park.

Jirisan Baraebong Royal Azalea Hik-17

Jirisan Baraebong Royal Azalea Hik-18

A couple of tips for this hike. If possible, I would highly recommend you start this hike early, particularly if you are doing the full 12.6 kilometers. This will hopefully allow you to get out in front of the bulk of the Koren hiking groups, though there will be the really dedicated hikers out there. Definitely take plenty of water, sunscreen, a hat and sunglasses, because the bulk of the hike is very much exposed, and the sun will beat down on your head during a sunny and bright day.


Kepler Track Day Three- Iris Burn Hut to Rainbow Reach Swing Bridge

Kepler Track Day Three-3

Success! It was the last day of my last tramp. All that stood between me and a bus ride to Queenstown was 22.2 kilometers of mostly easy walking. I spent the night at Iris Burn Hut, deep in the forest. During the middle of the night, I heard bird calls from both male and female kiwi birds outside, since they are nocturnal birds. That was pretty cool, because kiwis are adorable, fat, little birds and they are endangered in New Zealand.

Kepler Track Day Three-1

Kepler Track Day Three-2

Since I had about seven-eight hours of walking ahead of me, I started really early. I noticed the weather seemed to be much more pleasant today, with no rain or wind. After mentally shaking my fist at the weather gods and goddesses for giving other people a pleasant and beautiful alpine crossing (though you never know, since alpine weather is so protean), I set out on my journey.

Kepler Track Day Three-4

Kepler Track Day Three-5

I set off for my first stop at Motorua Hut, my planned lunch spot. The walk was fairly easy through beech forest, though there were some steep ascents and descents that weren’t mentioned in the brochure. I spotted some natural waterfalls, and beautiful views of the surrounding mountains and hanging valleys.

Kepler Track Day Three-6

Kepler Track Day Three-7

Five hours later, my tired body found its way to the shores of Lake Manapouri and Motorua Hut. It was a beautiful and peaceful stop for my final track meal. I was able to enjoy a leisurely break, but I had to put on the pack for the last two hour push to the Rainbow Reach carpark, and sweet, wonderful transport.

Kepler Track Day Three-9

Kepler Track Day Three-10

The final leg of the walk was pretty much flat and easy through more forests. There were a couple brief stopovers at local wetlands (some of which represented the Dead Marshes in the Fellowship of the Ring movie), but for the most part, it was just straight tramping. Shockingly enough, I even passed a couple of persons hiking, which was a first for me on this tramp.

Kepler Track Day Three-11

Kepler Track Day Three-13

Kepler Track Day Three-12

Soon enough, I saw the Gates of Paradise, or in this case, the Rainbow Reach Swing Bridge spanning the Waiau River that lead to the carpark. I was done! My body was tired. My clothes from the previous day were still soaked, and I sort of smelled like a wild animal. But it was all worth it for the exercise and beautiful views.

Kepler Track Day Three-14

Kepler Track Day Three-15

Kepler Track Day Two- Luxmore Hut to Iris Burn Hut

Kepler Track Day Two-1

There aren’t many pictures for this day of hiking, and it wasn’t an accident. The weather just did not cooperate enough for me to take many pictures after I left Luxmore Hut. And the few times the view would open up, I was too wet, cold and unmotivated to dig my camera from my bag.

For my second full day of hiking, I had hoped for sunny skies and minimal wind for this trek, since it was an alpine crossing. Alas, it was not to be. Instead of being treated with panoramic and gorgeous mountain vistas, I was treated to lashing wind, freezing rain and low clouds. I had envisioned my alpine crossing would be as majestic as the opening scenes of Lord of the Rings: Two Towers when Aragorn, Legolas and Gimli were chasing the orcs. Instead my day looked more like the scene in Lord of the Rings: Fellowship of the Ring when the fellowship tried to cross the Pass of Caradhras and were beset by howling wind and stinging snow. Of course I had no big strong man like Boromir to shelter me from the storm, so I was on my own to deal with the weather.

Sometimes the clouds would clear enough to get a hint of the majesty they covered, but for the most part, all I could see much of was the trail in front of me (thankfully for that, because who wants to get lost and stranded in an alpine environment). Most of the hike sidled mountains and crawled along ridge lines. There were brief moments, I got a glimpse of the awe-inspiring view around me, obscured by the thick, low clouds, and could see what this hike is like in very good weather. Alas those moments didn’t come often enough or last long enough. I can honestly say that I have not been this wet and cold, for such a sustained period of time, ever. For a brief period, I envisioned succumbing to hypothermia, but thankfully it never got THAT bad. I had my thermal and rain gear on, though I should have worn my rain pants. But still, I got soaked. By the time I finished the day’s hike, my socks were drenched, my shirt was wet, and my pants were soaked through, and I was cold.

Kepler Track Day Two-2

Most of the alpine trek was not TOO difficult physically for most of the way. There were some significant ascents, but they were mirrored by descents and flat spots. However, by the time I hit Hanging Valley Shelter (over three hours into the hike), I was officially over it. By that point, I was really starting to feel the rain and cold, and the path got rockier, muddier, and more uneven (a recipe for me falling on my cold ass). I was never so happy to reach the bush line. Yes, it was still raining, but at least the water fell directly on my head, rather than lashing harshly against me.

The frigid wind died down, and the temperature went up a few degrees. So I was able to go from miserable to just uncomfortable. The trail dropped, seemingly endlessly through the bush. The beech tree forest was lovely to behold as were the natural waterfalls cascading down from all the recent rain, and the raging river.The walk seemed interminable and I was passed left and right by tall Middle Earth elves, and I trudged along on my short hobbit legs. At this point, I just wanted it to be over for the day and kept wondering when the hut would come into sight.

Eventually the forest opened up, the birds and the angels started singing, and a halo of light shone down on the hut. At last! I had warmth and dryness and semi-comfort. It was practically heaven-sent. I actually wasn’t in a lot of physical pain from the trek, because it wasn’t that difficult (except for a few, steep, rocky ascents), but mentally I was done and just wanted to snuggle up something (or preferably someone) warm, soft and dry.

Kepler Track Day One- Te Anau to Luxmore Hut

Kepler Track Day One-7

Once again, I was up early. Not at dawn, because that was shortly after 0500 this time of year, but early enough. Today was my first day of hiking the Kepler Track, the last of my multi-day tramps in New Zealand. This hikes starts and ends in the town of Te Anau, a small town on the edge of Lake Te Anau and Fiordland National Park. The park is the largest national park in New Zealand that takes up a decent chunk of the South Island. I knew I wanted to do a Fiordland-based hike, and was drawn to the Kepler Track for a variety of reasons. First, it is not as popular, nor as regulated as the Milford Track, which is both (and apparently part of the Milford Track was closed during this period due to heavy rains, so extra bonus). I did want to do a hike that involved some alpine hiking, and the Kepler Track is well-setup as a loop track, and came highly recommended for its scenic beauty.

Kepler Track Day One-1

Kepler Track is designed to be a 61 kilometer, four day hike. However, you can combine the third day of the hike and half of the fourth day’s hike (like I did) and leave the track at Rainbow Swing Bridge. This track, unlike the other two I did, has about a day’s worth of walking in an alpine environment, and the first night’s stay at Luxmore Hut is well above the bush line with panoramic views of Lake Te Anau, the Te Anau basin, and the surrounding mountains.

Kepler Track Day One-2

I started the trek at the Department of Conservation Visitor’s Center right on the shores of Lake Te Anau. The first four kilometers of the walk was right along the lake, and in fact, you can get transport to the Kepler carpark where the trail officially starts. But since I was cutting out the last 9.5 kilometers of the fourth day of the track, I figured I would make up a little of that distance by walking to the track start point.

Kepler Track Day One-3

The first two and a half hours of the day’s hike to Brod Bay campsite is flat and well-benched through a beech and fern-laden forest. The walk was easy, gentle and peaceful, since I pretty much had the trail to myself. From Brod Bay, the track started to ascend. What I liked about the track is that most of the ascent was not super steep, but gradual. Make no mistake though, it was not a stroll in the park, because I gained 800 meters of altitude in around three hours of walking time.

Kepler Track Day One-4

All the tall, thin and fit trampers (think of them as the Elves of Middle Earth) passed me early and I was left to myself and the quiet of the forest. In my head, I looked like a fat little Hobbit waddling up the track with my big pack on my back and two walking sticks. At least I did go faster than the suggested journey time, so that felt good. For this part of the journey, the trail was mostly well-maintained, though there were some definite muddy spots.

Kepler Track Day One-5

After about two hours of hiking slowly, but steadily uphill, I hit the limestone bluffs, which are ancient remnants when this part of the track was under the sea millions of years ago.

Kepler Track Day One-6

Less than an hour after passing the bluffs, I hit the bush line and was rewarded with spectacular views of the Te Anau basin, Lake Manapouri and surrounding mountains. Since I was ahead of schedule, and had less than 45 minutes of walking left, I figured this was a great spot for a lunch break.

Kepler Track Day One-8

Kepler Track Day One-12

The rest of the hike was along a windswept ridge line out in the open. Here, the wind gusts were rather rough and chilly at times. Taking in all the scenery, I occasionally felt like I was in Lord of the Rings, hiking to Mordor with the Fellowship. Overall, the hike was a bit easier than I thought it would be, considering the altitude gain was the greatest of the hikes I’ve done in New Zealand. Maybe I was a bit fitter after a couple weeks in country. Maybe it was the steady but generally not TOO steep track. In either case, I made it, and I had all afternoon to relax, read a book, take in the gorgeous view and listen to the wind rattling outside.

Kepler Track Day One-9

Kepler Track Day One-13

I could feel the alpine chill and had to put on my thermals. The hut was buzzing with activity of the 50 people staying there that night. All around me, I saw groups of people making food to enjoy, talking, playing cards. I either watched them from a dispassionate distance or listened in to select conversations for the hell of it, when I wasn’t engrossed in my book. When the only activity planned for the day was a walk, that left hours and hours of daylight to contemplate. There was no beach like at Abel Tasman, and the sharp alpine wind and occasional rain discouraged wandering about outside. It was just too much of a production to put all my clothes and boots on, only to be harassed by the cold, rain and wind, when I had a perfectly fine view from the large windows in the common area. I already finished one book and decided to save the next book for the next day’s afternoon at the hut. There was no Internet, and not much else to do after dark, but take a well-earned deep sleep. I had hoped for clear skies to enjoy the stars in that isolated environment, but it was not to be. I just hoped that the weather held out for the next day’s hike during the exposed alpine crossing.

Kepler Track Day One-10

Arthur’s Pass and the TranzAlpine Train Ride- One of the Most Beautiful in the World

Arthur's Pass-18

Every travel book I read mentioned how beautiful Arthur’s Pass is, and how the TranzAlpine train ride was one of the best in the world. Arthur’s Pass is in the Southern Alps with the tiny village resting between the eastern and western sides of the Southern Alps. The train ride is approximately two hours from Christchurch and a gorgeous, slow journey across the Canterbury Plains, through beech forests, river gorges and up to the pass itself. It’s certainly the most beautiful and relaxing way to get to Arthur’s Pass.

Arthur's Pass-1

Arthur's Pass-7

I didn’t have my seat of choice for the train ride, since it was an aisle seat and a stranger was next to me, because the train was so full. However, this train had a very awesome viewing car. It was a normal train car, but there weren’t any windows so I had an open air view of the gorgeous scenery rolling past me.

Arthur's Pass-2

The weather was gorgeous on the way up to the pass, but once I reached Arthur’s Pass Village which resides at 737 meters (2418 feet) above sea level, the weather took a turn. It was pretty typical weather for the area, that often creates weather that is cooler, rainier and windier than areas around Arthur’s Pass. It rains about half of the year, and many days it can pour many millimeters. In fact, even with all the rain on the first day, it was still less than the rain that fell a month prior.

Arthur's Pass-3

After lunch, the rain did slow down a bit, so I headed out with the intent on hiking the entire Arthur’s Pass Walking Track, which was 3.4 kilometers one way north of the village. From the walking track are numerous side tracks that lead to other scenic viewpoints.

Arthur's Pass-4

Arthur's Pass-8

My first side trip was on the Devil’s Punchbowl Walking Track. It was only a one kilometer track to the 131 meters waterfall. I could see the waterfall from the turnoff from the main track on the bridge over Devil’s Punchbowl Creek. Most of the track consists of a series of steps  that climb 150 meters up to a viewing platform where I could view the base of the waterfall.

Arthur's Pass-9

Arthur's Pass-10

After returning from the waterfall, I walked a bit farther north to the Bridal Veil Falls lookout and more of the trail. It started to rain again, so I elected to turn around and walk back to the village with the intention of finishing the hike the next day.

Arthur's Pass-11

The next morning I headed out for some more hiking. My original intent before I got to Arthur’s Pass was to climb to the bush line of Avalanche Peak via the Scott’s Trail, but I could not find the trailhead even with a map, and the weather wasn’t THAT great, so I decided to walk the rest of the Arthur’s Pass walking trail. Thankfully the weather today was clear and as sunny as this area typically gets.

After the trail crossed the main highway, it broke off on a side trail called the Bealey Valley Track. The entire side trail was 1.2 kilometers and was quite scenic. I first reached Bealey Chasm, which was only a five minute walk from the trail turnoff. The bridge across the chasm is over a channel of rapidly running water cascading over huge boulders.

Arthur's Pass-13

Arthur's Pass-15

Arthur's Pass-12

The path continued, climbing a hill and emerging into a snowgrass clearing with very beautiful views of Mt. Rolleston/Kaimatau. The trail reentered a beech forest for a short stretch to Bealey River. The trail ended here, and it is a great place for a rest stop or lunch break to admire the scenery around you.

Arthur's Pass-14

After backtracking to the main trail, it was a short walk up to the Dobson Nature Walk. The trail ascended a bit through a series of switchbacks, and there were many sign points describing the alpine plants and the history of the pass.

Arthur's Pass-16

The trail then turned into the Lake Misery Track, which is a one kilometer stretch connecting the Dobson Nature Walk to the Otira Valley Track. The trail was actually through Lake Misery when the water level is low. Part of the track was boardwalked, but other parts were through narrow trails of tall grass and mud. Once the mud became too much of a nuisance for me to deal with, I turned around and returned to the village.

Arthur's Pass-17

After a leisurely lunch, it was time for the return train trip. This time I was able to snag a window seat on the most scenic side of the train car.

Arthur's Pass-19

In all honesty, if I had known what the weather situation was going to be in advance, I might have just elected to do Arthur’s Pass in a day trip. If you don’t want to hike Avalanche Peak or any of the other long tracks, you can easily see the main sights of Arthur’s Pass in a day. There are five hours between the morning train arrival at Arthur’s Pass and the afternoon return train to Christchurch. That is enough time to walk the entire Arthur’s Pass trail up and back, and enjoy all the side trips, and still make it back for lunch.

Arthur's Pass-20

But if you can swing it, I definitely recommend at least a full day’s trip to Arthur Pass. Between the gorgeous train ride and the gorgeous scenery of Arthur’s Pass village and the walking track, the alpine setting is worth your time.

Arthur's Pass-5

Arthur's Pass-6

Queen Charlotte Track Day 4- Portage Resort Hotel to Anakiwa

Queen Charlotte Day Four-9

I woke up on the final day of the Queen Charlotte Track with disappointment and a sore body. While I wasn’t in any abject pain from the previous day’s slog, my muscles were still sore and it knew it had another hard day of 21 kilometers of hiking ahead of me. The disappointment came from the fact that it was very cloudy and drizzly. It reminded me more of a Washington State summer, rather than the sunny, New Zealand summer I expected. I wasn’t particularly thrilled at the prospect of walking eight hours in the rain. But I was here to do the entire track, so I put on my rain coat and steeled myself.

Queen Charlotte Day Four-1

As per usual, the first hour of the walk was a long, hard, steep climb up a muddy, rocky track. This was particularly exacerbated by the rain. My poor calves woke up grumpy again at the rude awakening of the supremely steep incline. After about an hour, the trail leveled off, but because the clouds were so low, I couldn’t see the sound below.

Queen Charlotte Day Four-2

Queen Charlotte Day Four-3

The track got much easier, and the path became less steep and shortly after that, the rain stopped and the weather cleared. 90 minutes later, I hit the Te Mahia Saddle, which both surprised and relieved me.

Queen Charlotte Day Four-7

Queen Charlotte Day Four-8

My tramping book and the Department of Conservation signs said it was a four hour walk from Torea Saddle to Te Mahia Saddle, and another four hours to Anakiwa. I certainly wasn’t walking fast at all, so I think the track was altered a bit to make it easier. I was relieved, because the track was predicted to be eight hours long. I started the track at 0800, and I had to meet my boat back to Picton at 1600- exactly eight hours later. It was nice not to have to worry about making my ride, and not have to run, and still able to enjoy lunch with a scenic view.

Queen Charlotte Day Four-4

Queen Charlotte Day Four-5

Queen Charlotte Day Four-6

The track got substantially easier after Te Mahia Saddle. Most of the path was wide, well benched, with gentle ascents and descents. The track also got more picturesque, because the weather cleared. The trail also go more crowded, and I think I saw more people on this part of the trail than I did in the previous three days of hiking. I ran into so many day walkers and mountain bikers, which was a change from the previous days’ walks where I practically had the track to myself.

Queen Charlotte Day Four-10

Queen Charlotte Day Four-11

I was ever so glad to see the sign indicating I arrived in Anakiwa, and I was done. It took me four days to walk an ,at times, strenuous 71 kilometer track. There were times I wondered why the hell I chose to do this, but for the most part, I was very glad I did this walk. The walking was good, and the scenery lovely. I was grateful to have hotels to stay in at night and my pack transported for me. Now I could rest (for a bit anyway, since I had my final tramp planned for a week and a half later). My body was relieved.

Queen Charlotte Day Four-12

Queen Charlotte Day Four-13