The third day of the Queen Charlotte Track happened to be the longest, hardest slog of the track, AND it also happened to be Christmas Day. So this day was sort of a day of treats. The first treat was Mother Nature’s Christmas gift to us hikers. The day was bright, warm and sunny- a complete contrast from the day before. It’s amazing how much some sunshine can transform a natural setting from blah to astounding. The second treat was the “treat” I gave my body that day, though I’m sure it eventually thanked me later after it stopped aching and I got some deep sleep.
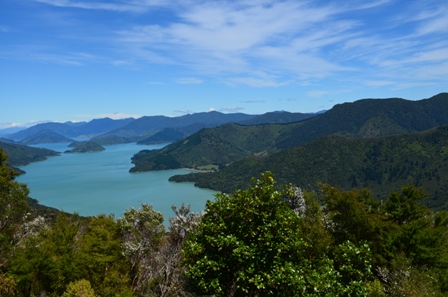
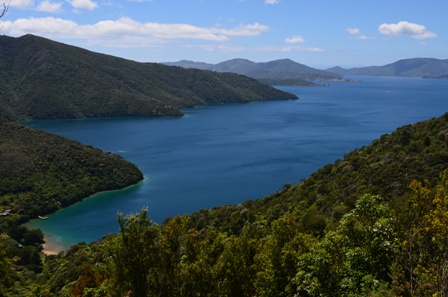
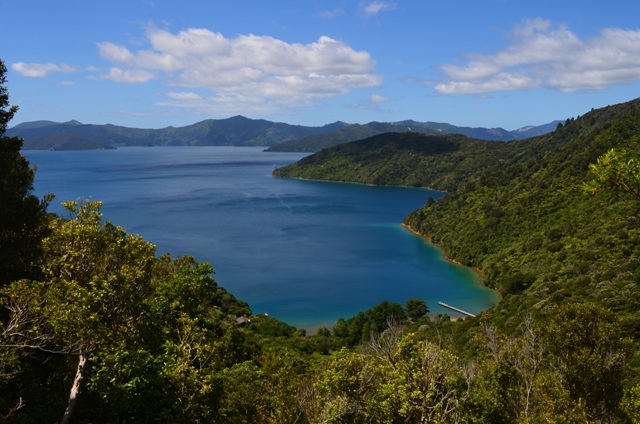
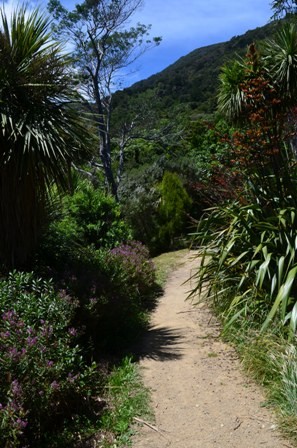
Like I said earlier, today was the longest day of the track. It was 24.5 kilometers and it took me eight hours to get to my next destination of Portage Resort Hotel, though granted, that time included stops for rest, photo opportunities and lunch. I was particularly grateful today to only have to carry a day pack, and even though Cougar Line doesn’t operate on Christmas Day, they transferred my pack to my hotel the night prior. The sun was hot and bright for the duration of the walk (sometimes it felt too hot and bright). Part of the walk was under well-shaded forest trees, and other parts were on top of the exposed ridge line. The views of Endeavor Inlet, Kenepru Sound, Marlborough Sound and the like were astounding.
This walk also had some of the steepest inclines, and my poor calves were screaming at me to stop at times. In particular, they nearly rebelled during the short, but VERY steep climb up to Eatwell’s Lookout that gave me a panoramic view of the sounds. Lunch was also on a bench in front of a particularly scenic view.
The worst part was the last two hours. It wasn’t difficult. In fact, it was mainly a gentle ascent and descent of the trail. But by that point, I had been walking six hours and I was hot, tired, and fantasizing about a good shower and a massage. But I made it to my destination, which was my third treat of the day.
I spent the night at the Portage Resort Hotel, and it was wonderful to indulge in a small bit of luxury amid all the huts and hostels I normally stay at. My hotel room had an excellent view of the sound, and I capped off the day with a cool swim in the unheated pool by the beach. My day ended with a very tasty (though rather pricy) Christmas Day buffet. Though it was kind of funny how the maitre’ d didn’t even have to ask my name when I showed up to be seated. After all, I was the only one who booked a seating for one. By the end of the evening, I pretty much crashed into my bed for a long summer’s nap (I was in the South Hemisphere after all).
The second day of the Queen Charlotte Track was an easy day of walking, and I originally intended for it to be a relaxing day outside by the shores of the sound, maybe even do some kayaking. But a little thing called Mother Nature had different plans. The morning was gray and cloudy with a chance of rain.
I set out early, wanting to arrive at my next destination, Punga Cove Resort by lunchtime. I also hoped it would stay dry for the entirety of the walk, but it was not to be.
There were intermittent sprinkles to mild showers for my entire walk. But amazingly enough, it wasn’t actually cold. It actually felt cooler the day prior with the wind and bright sunshine.
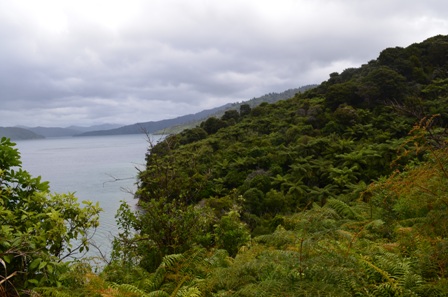
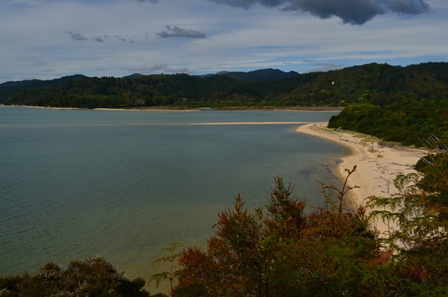
The trail was actually very easy. Most of it was flat and near the shore, and the ascents and descents were very gentle. The trail was mainly coastal forests, but there were many glimpses and views of Endeavor Inlet. However, the colors of the foliage and of the water weren’t nearly as bright today, thanks to the gray pallor and clouds that hung over the Sound.
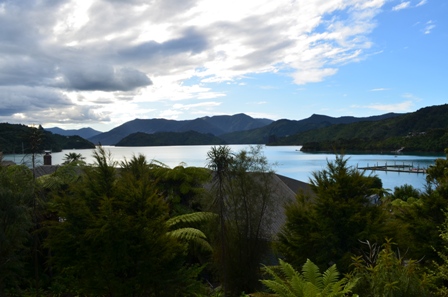
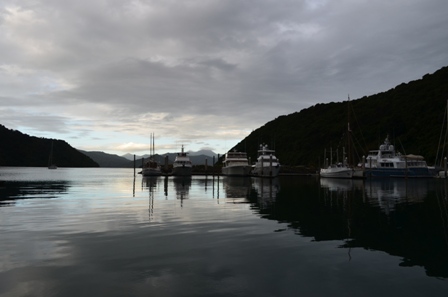
This day’s hike was 12 kilometers and took me three and a half hours. The weather didn’t really unleash until I arrived at the Punga Cove Resort, thankfully. The rest of the afternoon consisted of increasing rain and harsh gusts of wind. I safely and dryly enjoyed the gorgeous view from my room balcony. Instead of partaking in outdoor activities, I curled up with a good book.
the view from my hotel room at Punga Cove Resort
I capped off the day with a melt-in-your-mouth dinner of venison in blackberry sauce and some more local wine (I adore New Zealand wine). It was certainly a sedate Christmas Eve, unlike my typical ones where I booze up alone and watch Bad(der) Santa on DVD.
Like usual, the day started early (I say that a lot, but whatever, it’s true), because I was scheduled to start the four-day Queen Charlotte Track. This was the second of three multi-day tramps I was doing in New Zealand. I only had a one full day between the Abel Tasman and Queen Charlotte tracks, but I was ready. This track is set in the Marlborough Sounds, which is in the northeastern part of the South Island. This track takes you through lush, coastal forests, but these forests are different than the ones on the Abel Tasman Coastal Track. This track is also filled with steep uphills and downhills, wide open views of the Marlborough Sounds from exposed ridge lines, and the occasional mountain biker (though I only saw them on the last day).
This walk is more difficult than the Abel Tasman Coastal Track. This one is four days (though if you wanted to, you COULD shave some time by combining the first and second days’ worth of walking into one long day of walking, if you so desired). The track length is 71 kilometers, the changes in altitude are also greater, and the trail grades are sometimes steeper and less well-benched. However, in other ways, I almost consider the Queen Charlotte Track to be a luxury walk. Most of the other multi-day tramps require you to stay in campsites, or huts (which like I said before is basically camping indoors), and you have to carry your own pack (no Sherpas available for hire in New Zealand) with everything in it (e.g. food, bedding, stoves) to last you for the entire hike. But not the Queen Charlotte Track. This track has plenty of very nice, private hotels available to stay in. Accommodations with quality rooms, real beds, electricity, real bathrooms and showers, wireless Internet, and restaurants. Even better, there are water taxi services, like Cougar Line, that will transport your packs from accommodation to accommodation for a fee, so all you have to do is carry a day pack on the track with you.
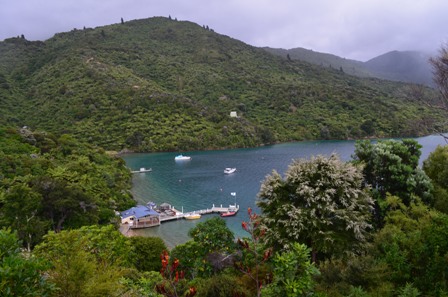
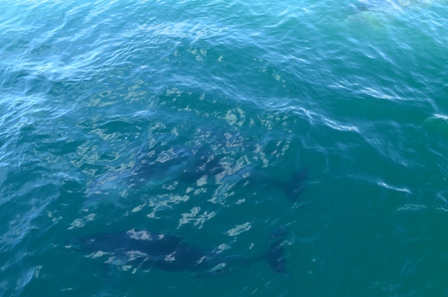
The track starts at Ship Cove, which is about a one hour’s boat ride from Picton. The boat ride was very pleasant, because the weather was sunny and warm enough. On the way, we stopped to watch a pod of dolphins (including some baby dolphins) swimming toward Picton.
There is no road access for a decent chunk of this track, and the start is no different. At Ship Cove there was a monument to Captain Cook who stayed there four times over the years. It was also a nice place to enjoy some breakfast at picnic tables, while I let all the other walkers get ahead of me.
The track ascended very quickly and steeply for the first 45 minutes to the lookout over Motuara Island, Queen Charlotte Sound, and Resolution Bay. My poor calves woke up screaming during the initial ascent, and I was glad I had my walking sticks with me.
After that, the track dropped steeply to Schoolhouse Bay campsite and Resolution Bay cabins. While the track did ascend again, the trail grade was much gentler, so I found the trail rather easy to ascend. At the top of the saddle, I was rewarded with an astoundingly beautiful view over Endeavor Inlet. In fact, I could see the area where Punga Cove Resort was, which was my lodging for my second night on the track. This was a perfect spot for lunch to give me more time to drink in the view.
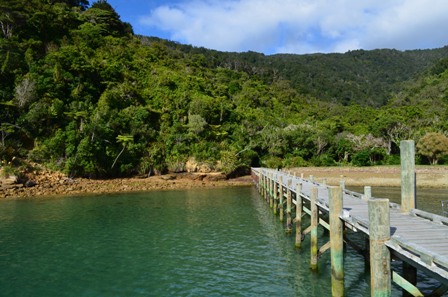
From here, it was only a 90 minute walk to my lodging at Furneaux Lodge. The trail descended just as gently and I was treated to occasional views of Endeavor Inlet on my way down.
Soon I found my way to Furneaux Lodge, which was a very nice establishment right on the shores of Endeavor Inlet. The lodge has a sort of British-style charm to it. I stayed in one of the backpackers cabins, which was a rather comfortable four-person room, though I had the room to myself, with a nice view of the water.
I capped off the day with an absolutely scrumptious dinner of gourmet chicken burger (w/ smoked bacon, brie cheese, avocado, and apricot relish) and a refreshing glass of local Gurwurtztraminer white wine (one of my favorites). The first day of the track was 15 kilometers of walking and took me around five hours, but that included an extended lunch break and numerous photo stops. The weather was perfect, and it was nice to sleep in a real bed.
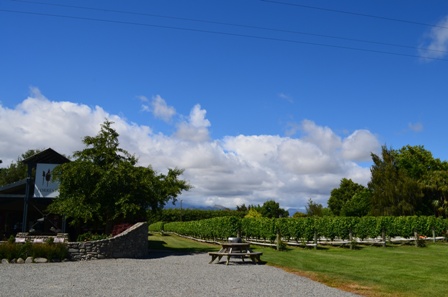
Since I was spending some days in the Marlborough region (even if most of them were on the Queen Charlotte walk), I wanted to do a winery tour. I love wine in general, New Zealand wine in particular, and the Marlborough region was one of the premier wine-producing areas in New Zealand. The question was what sort of winery tour to do, since there were many possibilities to choose from.
The tour that appealed to me the most was Wine Tours by Bike. To me, it was the best of both worlds. I could see as many wineries as I could fit into a five hour block of time, and it was a self-guided tour by bike. I chose the wineries, and I chose how long I stayed at each winery, and where I stopped for lunch.
The tour guide picked me up from the Renwick bus station and got me set up. I set off with a bike, a winery map, and a plan. Two wineries were really close to the tour site, Forrest and Farmingham. Both of them had ample amounts of tasty wines to sample.
At Forrest Winery, I bought a sample of six wines of my choosing for NZ $7. I loved the Guwurtztraminer (a German-type wine I’ve found relatively common in New Zealand), and the dessert Riesling. Mindful of the fact that I didn’t want to carry bottles of wine throughout New Zealand, I bought a bottle of the smaller dessert Riesling, and I figured I would drink it before I left (I didn’t, and took it home with me to be savored later).
After that, I headed to the next winery. It was kind of peaceful biking through the flat country roads surrounded by vineyards. The only thing I had to worry about was biking into the wind, since drivers seemed to be very mindful of bikers. My next winery was Framingham, where I found just as many tasty selections of wine. I was HIGHLY tempted to buy a bottle of the Select Riesling, but again, I went with the smaller dessert wine bottle to save space (I wish wineries would make smaller bottles of wine).
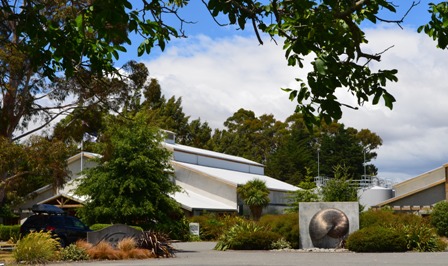
Just up the road were two wineries across the street from each other, Nautilus and Wairau, and Wairau was where I chose to have lunch. But before lunch, I had a tasting at Nautilus. It had the most extensive tasting for free. I loved the Opawa Sauvignon Blanc and the Pinot Gris, but I couldn’t fit more wine bottles in my backpack. But I did make a note of which US stores sell Nautilus wines for future reference.
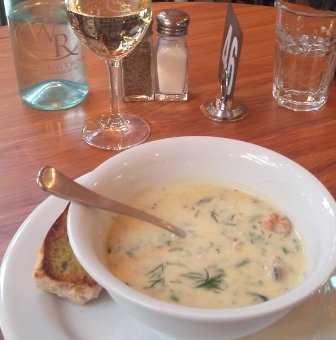
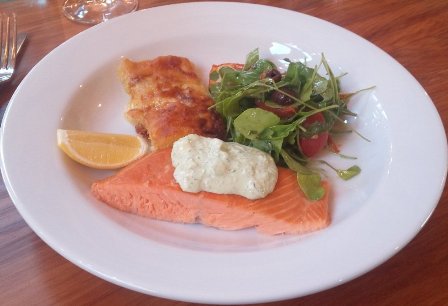
Lunch was at the Wairau River Winery across the street. I selected an absolutely scrumptious meal of a mussel chowder starter, followed by hot smoke salmon, potato gratin and tomato and olive salad, accompanied by a glass of Reserve Sauvignon Blanc. It was completely divine.
After lunch, I got on my bike and pedaled down the road to No. 1 Family Estate, who specialize in sparkling wine. I tasted three flavors- the No.1, the No.1 Rose, and the No. 8. All were tasty, but I elected not to buy.
I headed to my final winery stop at Herzog Winery. It is a high-end, boutique winery specializing in expensive, organic wines. I was able to taste five wines, but not my beloved Guwurtztraminer, since they were out of it. I particularly enjoyed the Riesling, the Vigonier, and the Arneis.
My absolute last stop was at Wine Village to purchase some gourmet, local olive oils for me and a gift. All in all, it was a very pleasant day. If you like wines, and like, or at least can tolerate, easy bike riding on flat roads, I HIGHLY recommend this tour. It is probably the best value for your money when it comes to wine tours. You set the pace. You set the itinerary (within established time limits), and you can try all the wine you want, and enjoy a gourmet meal at a local winery if you desire (for additional cost of course, but definitely recommended). The tour operators are very lovely and helpful people. They made some recommendations on how to have the best tour possible, and they even assisted me with my lunch reservation. They really do what they can to ensure you have a wonderful day.
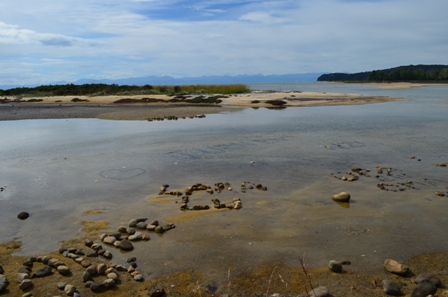
You guessed it: I started early this morning, but this time it was required. Right in front of Awaroa Hut is Awaroa Inlet, and it MUST be crossed. There is no all tidal track alternative like every other part of the track, so it must be crossed two hours on either side of low tide. In this case, low tide was around 0630. So when I woke up early, for the first time, I wasn’t alone.
This crossing will get your feet wet, so I initially decided to cross in my beach shoes. However that quickly proved untenable, because my shoes became filled with rocks and shells. It was less painful to cross barefoot, though I had to be careful where I put my feet. Fording shallow tidal rivers was easy, but I didn’t enjoy the rocks and shells underneath my feet. My feet are rather sensitive to pain, which is a bit surprising considering how hideous they can look if they haven’t been exfoliated in a while.
It took about 20 minutes to cross the inlet. Once across, I donned my hiking boots for the final six kilometers to Totaranui Beach, which was the final end spot for me. You can add another day of hiking out to Wainui Bay, but I elected not to when I realized that getting transportation out of that site was rather difficult. Most of the hike was again in lush coastal forests and up hills and down hills. Occasionally a sea view would emerge and then the final beach trek at Waiharakeke Beach.
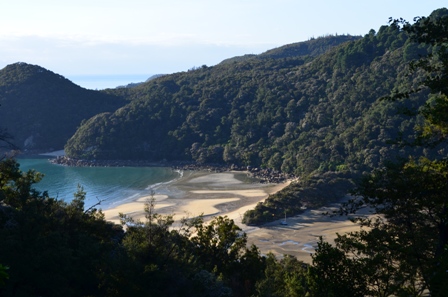
Knowing only 30 minutes of walking remained made the very last series of steep switchbacks easier to bear. The final look out was at Skinner Point, and I could overlook the promised land- or at least my final destination of Totaranui Beach.
10 minutes later, I gratefully dropped my pack in the shade of trees as I finished and arrived at the beach. It was four days and 38 kilometers of beautiful coast walk. There are busses and water taxis for the return journey, but I elected for the bus, because it would take me back to Nelson in less time and less money than it would have cost me to take a water taxi back to Marahau and then a bus back to Nelson. The only thing that stood between me and a refreshing shower (which I needed very much) was a three hour bus ride back to my hostel. But I did it. I completed my first multi day hike and I was ready for more.
I started early again the third day, not because I had to meet some tidal timeline, but just because I woke up early and had nothing else to do. I would rather complete my daily hike early and relax at the hut rather than start late. Plus again, starting early means the weather is still cool and I have most of the track to myself.
The tracks went up hills and down hills in the forest, and I don’t know if the hills were steeper that day, but I was definitely feeling it more. My daily walk was 11.5 kilometers and it took me about four hours. Finally, the track turned to actual beach walking for part of the way. There was a 1 kilometer stretch along Onetahuti Beach, and the last 20 minutes along Awaroa Inlet to the hut.
I was the first one to arrive at the hut again, and this hut had the water right in its front yard. However, this hut only had the big open bunks with seven mattresses side by side. But at least I was able to stake out a wall to myself, so I was only sleeping next to one stranger, rather than two. I relaxed with lunch and a nap, and I was still on my own during early afternoon.
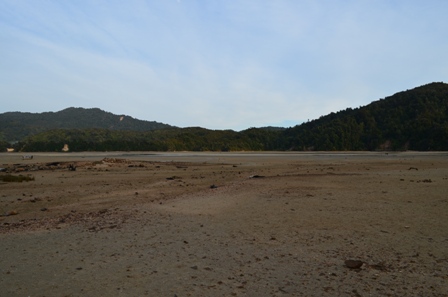
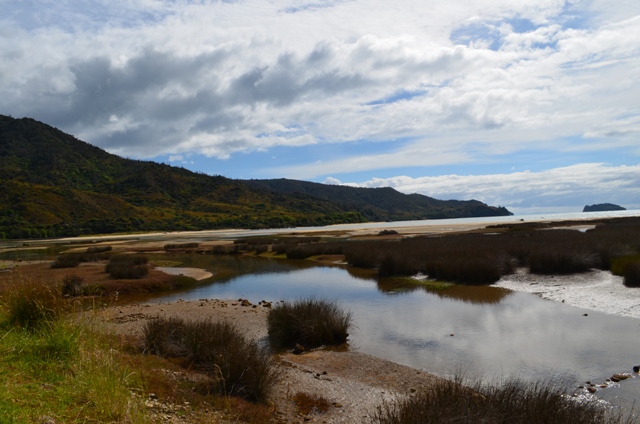
Awaroa Hut is right on the edge of Awaroa Inlet, and it was here that the tidal differences in Abel Tasman National Park are the most starkly evident. At high tide, the entire beach is covered in water and most of the path along the beach was under water. However, at low tide, you could walk across the entire inlet (though your feet will still get wet, because the inlet is never entirely free of water).
It was also fascinating how much the wind affected the temperatures. It was sunny and warm all mornings, but the previous two days were a bit cloudy, and rainy at times, and substantially cooler. Like need a fleece jacket cooler. And unless it was sunny all day, the water was too cool to swim in (for me anyway).
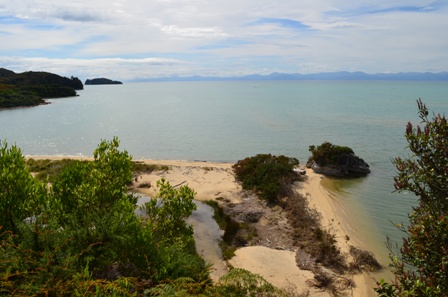
Because I had the entire rest of the day to myself, I decided to make my way to Awaroa Lodge. It was only a 20 minute walk from the hut to the lodge, but it required me to cross the Venture Creek tidal flat, which could only crossed three hours on each side of low tide, unless you wanted to swim across that is.
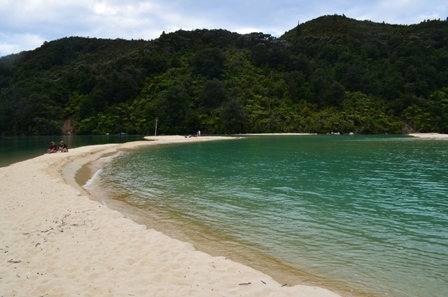
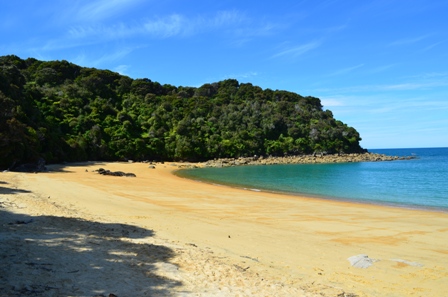
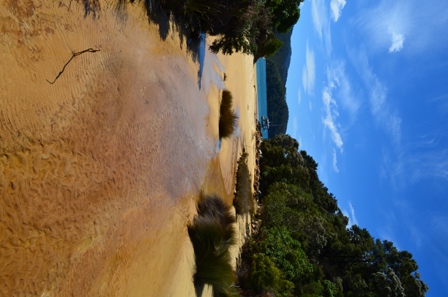
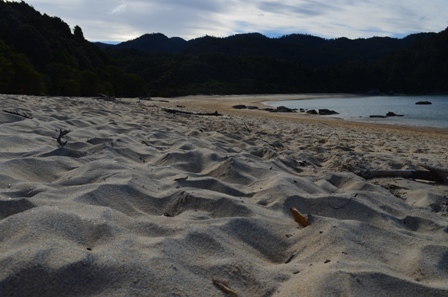
Over there is a HUGE, soft white sand crescent-shaped beach, which was in stark contrast to the nonexistent beach in front of the hut. The water was still too cold for me, but I just sat on the beach in the warm sun listening to the soothing sounds of the wind and the waves as I took in the gorgeous scene around me.
I capped off the day with an absolutely delicious dinner and wine at the Awaroa Lodge. When I heard that the lodge served actual meals, I knew I couldn’t pass up the opportunity to eat a real, cooked meal. I had eaten trail food for the previous three days. I elected not to bring a stove, so everything I ate was cold and didn’t require cooking. So I treated myself to a fantastic cup of sea chowder and bacon-wrapped chicken with cranberry stuffing. It was like ambrosia to the tongue and I savored every bit.
This morning , the second day of hiking, was even earlier for me than normal. It’s funny that when I am at home on normal weekends, I often like to sleep in. But on vacations, I am usually up early to take advantage of the day. Of course it is also easier, because I tend to fall asleep earlier, because I don’t go out and party. And since there was no electricity or Internet at the Anchorage hut (or any of the Department of Conservation huts for that matter), and I was hiking alone, I was down for the count by 2100 to get a full night’s rest.
I woke up at 0530, shortly after sunrise. In fact the moon and the sun were out at the same time. This morning was earlier than normal, because I wanted to use the low tide track across Torrent Bay to shave off 3 kilometers or one hour of walking. It doesn’t sound like a lot, but my foot was still hurting from the previous day’s blister, and my body was still getting used to carrying a multi-day pack. The day’s walk was only 9.5 kilometers, which equated to only three hours of walking. But I needed to be across the bay by 0730 before the tide rose too high for me, since I could only use the low tide track two hours on either side of low tide, and I had to take the all tidal track.
So away I went, and it was an excellent decision. It was the first time to walk across a tidal track at low tide. I crossed Torrent Bay by following the orange disks which mark the trail in places like beaches and tidal flats when the trail isn’t obvious. But most of all, the reason my early start was a good one, was because I had the track nearly entirely to myself. Most people were still sleeping when I started walking. In fact, I only saw one other person on the track until I had nearly completed my day’s walk. It was awesome to practically have the park to myself, and enjoy the beautiful nature in peace and solitude.
The track wended its way up and down hills and across the river. Most of the time I walked in lush, beautiful coastal forest, but every so often, the trail would open up to spectacular vistas of the sun, sea, and gorgeous coastline.
I set out so early that I arrived at my destination shortly after 0900. In fact, I couldn’t even occupy a bunk, because the previous night’s occupants were still there having breakfast and hadn’t left yet. Another advantage of being so early was getting to pick my bed. This hut had three rooms for bunks. Two of them had space for 14 bunks, but the upper and lower bunks were wide open where all seven mattresses were pressed up against each other. A room tucked in the back had six separate bunk beds, and since I didn’t want to sleep next to a stranger if I didn’t have to, I snagged one of the individual beds.
All I had to do all day was relax on a beautiful beach, read a book and be lost in thought. I had hoped to go swimming, but it was too cold that day. The day started out sunny and warm, but turned gray and rainy and chilly by early afternoon. That gave me an excuse to curl up with a good book (I even managed to finish the book that day).
Later in the evening, the rain stopped and I made my way down to the beach and marveled just how different it looked at low tide. It was very peaceful to watch the waves crash gently on the beach, the tidal force inexorably drawing the waves higher and higher as the tide slowly rolled in.
I could close my eyes and just hear the wind, the sea, and the occasional bird call, but no human beings. It was just me and nature.
This day started early (like so many of my days on vacation), because of transportation requirements, since it was a two hour bus ride to the start of the Abel Tasman Coast Track in Marahau. It was my first day walking the Abel Tasman Coastal Track, my first of three multi-day walking tramps in New Zealand. I first visited New Zealand eight years prior, and did all the beautiful nature and adventure sports. But I wanted to come back and do a few of the tramps that New Zealand is famous for.
Due to scheduling requirements, I chose to do the Abel Tasman Coastal Track first. This proved to be a good choice, because this track is considered much easier than most tracks. The distance is not that excessive. While there are some steep ascents, they are always very short. This is a hike that can even be done in sneakers if so desired and not hiking boots. Now granted, I had to carry my large backpack every day, but the trail wasn’t that difficult. In fact, this trail was the perfect training for other, more difficult multi-day tramps I planned to do during my vacation. It got my body used to walking every day, and carrying a 25-pound pack on my back.
Abel Tasman National Park is New Zealand’s smallest national parks, but it is one of the most popular. It is located in the Golden Bay area in the northwestern part of the South Island. This particular park is filled with golden beaches and seaside forests that reminded me of the Caribbean and Hawaii.
The Abel Tasman Coastal Track can be done in three to five days, depending on how far you want to walk and where you want to stay. Since this park is so popular (around 30,000 persons walk at least part of the Abel Tasman Coastal Track per year), persons can’t stay overnight in the park unless they have reserved a place in a Department of Conservation hut or campsite. Since I am not a fan of camping, I went with staying in huts. I elected to walk 38 kilometers over four days. This ensured that I walked no more than four hours a day, which left me ample time to relax on site and enjoy the beautiful beaches and other nature.
My first day was hiking from Marahau to Anchorage, which was only 11.5 kilometers or four hours of hiking, so I was done with my walking for the day by lunchtime. After years of hiking in Korea, this trail was a dream. It was wide, well-graded, and well-benched. There was no scrambling over boulders or anything like that. It was walking on a well-designed trail that enabled me to fully enjoy the beautiful nature around me.
There were plenty of people on the track during my walk. Part of it was that I didn’t start walking until mid morning so more people were awake, and I was with a group of people who came on the bus with me. Plus there were a lot of people doing day walks by walking either to Anchorage or from Anchorage. Water taxis went to all parts of the park, so it was easy for day trippers to come and visit and walk part of the track if they so desired.
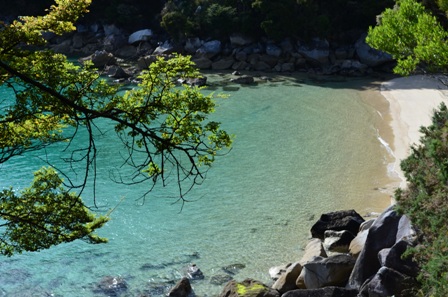
At first I thought most of the track would be on the beach, but that is not the case. While small parts of the track are on the beach, most of the track is a bit inland through a shaded lush coastal forest, and every so often emerge to be rewarded with spectacular views of the lush coastline and the pristine blue water.
Anchorage was a popular site for visitors, so when I arrived there, there were plenty of people sunning themselves on the beach and enjoying lunch. There wasn’t much else to do, but walk along the beach, swim in the sun-warmed water and relax in peace. A short 15 minute walk from Anchorage is Te Pukatea Bay camp site, which is right on a quiet, isolated beach. If you wanted some solitude, this was the best place to get it.
My body was surprisingly hurting after the first day. Part of that was undoubtedly because I developed a blister on my heel that would plague me for the rest of the track. But even the rest of my body was a bit sore. While I’ve hiked plenty of day trips, this was the first time in a while I carried a sort of heavy pack on my back.
While I was staying in a DOC hut, it is basically camping indoors. These huts have mattresses and flushing toilets, but that is about it. There is no electricity, no gas cookers. If you want hot food, you have to bring your own stove and make it yourself, since there is no food sold on site. There are no showers, and of course there is no Internet. So it was just me, beautiful nature, and a fully charged e-reader for when the weather turned south. It meant relaxing on the beach, which is something I don’t typically do for long periods of time.
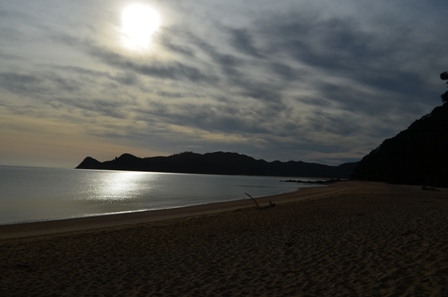
I ended up falling asleep before the sun went down, which isn’t that difficult when the sun doesn’t set until after 2100 at night. I woke up in the middle of the night. Everyone was asleep, and it was dark and silent outside. The nearly full moon was out in force, shining its cold, pale light over the beach with the lapping waves. It made me feel very connected to the natural world. It was a good way to end my first day of hiking.
There are a few basic reasons to come and visit New Zealand in my opinion. There is the obvious beautiful nature that abounds in that country. There is the amazing, world class wine that can be found everywhere. There of course is Lord of the Rings/The Hobbit, though that is often tied to the beautiful nature of the country, because of the many New Zealand areas used in the films. And you can’t overlook adrenaline activities. New Zealand is considered one of the capitols of adrenaline sports in all the world. Pretty much if you can imagine it, it can be found in some part of New Zealand. It’s one of the reasons I wanted to come to New Zealand so many years ago.
My first trip to New Zealand was eight years ago in November 2005, and I came prepared to indulge in a wide variety of adrenaline creating activities. I wanted to do another tandem skydive, do my first bungy jumps, cave rafting, abseiling, luging, and the like. I was a bit of a different person back in the day. I was fascinated by adrenaline activities, but I also a bit scared. I still had visions of losing control and dying. I did do some luging in Rotorua, but I stayed on the slow track and was afraid to go fast for fear of losing control and getting hurt. I did do two bungy jumps when I was in Queenstown. My very first one was the Ledge Bungy at the top of Bob’s Peak. The jump was sort of an impulse decision, because I was up there enjoying the view, saw there was no line, and figured why the hell not? So I paid, I got harnessed up, and the next thing I know, I’m doing a running dive off the platform into 47 meters (154 feet) of air over Queenstown. My next bungy was a bit different experience. It was the Nevis bungy, which is 134 meters (440 feet). It was a completely different scenario. The bungy site is about a 40 minutes drive from Queenstown in an isolated canyon. The jump is from a gondola over the canyon that sways in the wind. And to top if off, you have to walk the plank like on Captain Hook’s ship, and are told you have to do a big dive to prevent the bungy cords from getting tangled. I had visions of the cords snapping, and it certainly wasn’t helped by the jumpmasters who loved to rev up my fear and adrenaline. In particular, I was terrified I would accidentally fall off the plank. I know that is a somewhat ironic thought, since I paid good money to jump out of a gondola. But to me, there is a big difference between an accidental fall and a controlled jump. One leads to a tremendous adrenaline high, and one leads to injury and death. I did get off the platform eventually, but it certainly wasn’t easy for me. If you looked at my video, you would probably laugh, because I’m standing on the platform, covering my face in fear. I basically had to be coaxed off the platform, and the jumpmasters were THIS close to calling it. But I did it. I dove for all I was worth, and I obviously lived. It was probably the most scared I’ve been in my life, but I did it.
Fast forward eight years and I’m a bit different person. The logic portion of my brain asserted itself, and I know I’m not going to die doing these activities. For the most part (with a couple notable exceptions), these activities are safe. I don’t engage in these activities, because I want to feel like I am skirting death. I do these activities, because I know I will survive, and I crave the adrenaline rush. So unless you have a deathly fear of heights or specific medical conditions that contraindicate it, there isn’t much to stop you from participating in adrenaline activities to the fullest extent, if they interest you. I did the Skyline Luge in Queenstown, which has a similar setup to the one in Rotorua. This time though, instead of poking along on the scenic track, I raced along on the advanced track, trying to get as much speed as I could. Of course I wasn’t reckless, because there is still that controlling streak that runs through me. But I’m not scared anymore, and I want more adrenaline and more speed (though there are limits).
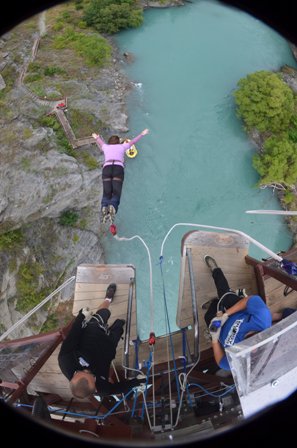
I wanted to complete the AJ Hackett bungy jump quadfecta (not a word, but it serves my purposes) this trip in New Zealand. That involved me doing two more bungy jumps, and I kicked it off with a dive off the Kawarau Bridge in Queenstown. The Kawarau is the original bungy site, and it celebrated its 25th anniversary in 2013. It is the classic one. It’s not the terrifying thrillseeker that is Nevis, because Kawarau is only 43 meters (142 feet). But the site is a beautiful one over the Kawarau Bridge, about a 20 minute drive from Queenstown. This bungy site is well set up for jumpers as well as visitors who just want to watch the adrenaline freaks dive off a bridge. This time I wasn’t consumed with fear, because I had spent some prep time imagining me doing the dive successfully and confidently. My only fear was freezing at the launch site.
This bungy jump is a bit different than other ones, because they wrap your ankles in a towel and bind them together; you have to hop into position. I waved bravely for the camera and for the watching crowds (too bad you weren’t there Mom, since you did visit there during your visit nine months prior). I inched forward into position, so my toes were just over the plank.
The jumpmaster gave me the 1-2-3 countdown, released his hold on me, and I boldly dove for the horizon.
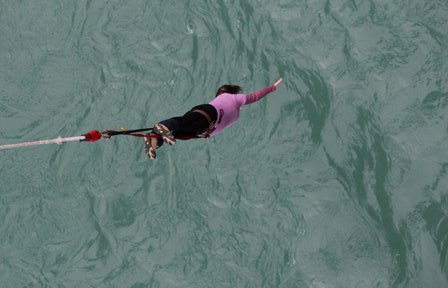
The fall only lasted a couple seconds, but I could see the river rushing toward me.
Then I felt the delicious tug of the cords as I reached the end of the bungy cords, and I bounced a couple of times. I was going to live!
Once I stopped bouncing, the jumpmasters lowered me head first until the boat team in the river grabbed me and unhooked me. It was SUCH a feeling of relief lying in the boat, looking up at the bridge and waving for the camera.
The adrenaline rush made me giddy and it was a great way to start the morning. Hell, I even got some compliments on my jump from some of the spectators.
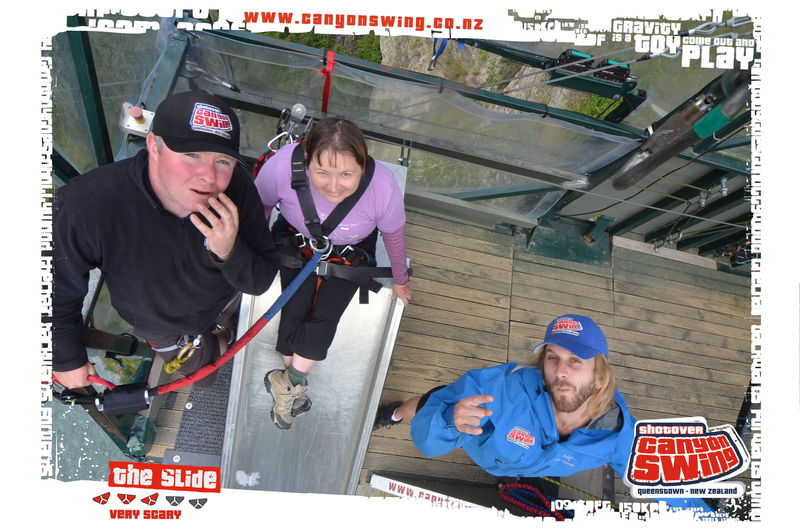
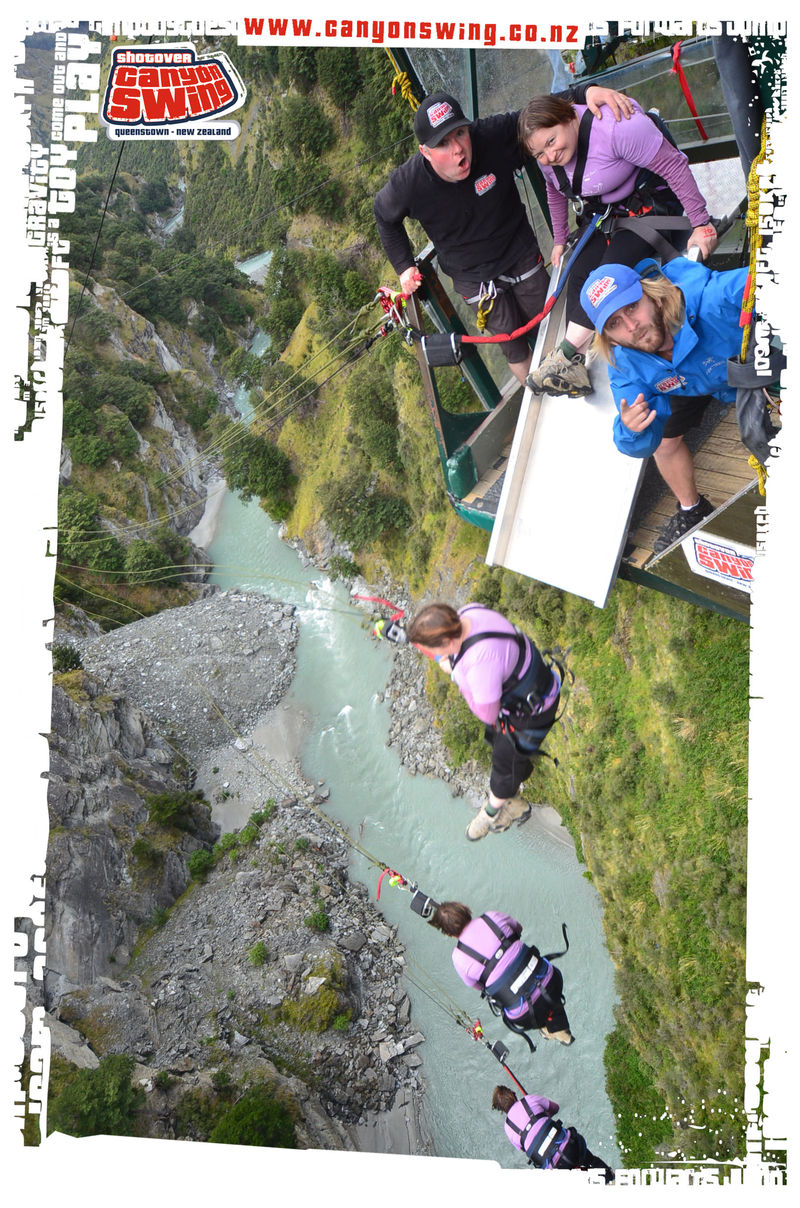
But I wasn’t done that day. I still needed more adrenaline. That afternoon, I had a canyon swing planned. There are a couple different businesses that do canyon swings, but I elected to go with Shotover Canyon Swing. They are the original business in Queenstown, and they have the widest variety of jump styles. I had done a canyon swing once in Interlaken, Switzerland, and I wasn’t that pleased with my performance. I did it, but I had several false starts before I jumped. I had to basically do a running start to get off the cliff, and I kept psyching myself out at the last second, before I finally shut off my brain long enough to jump. This time around, I was much more serene, mainly because I picked a different type of jump than a forward leap (that was the only option in Switzerland). There are dozens of ways you can jump: forward, backward, upside down, with props, etc. I elected to do the Slide. The jump is pretty much the way it sounds. The jumpmasters set up a metal slide, and you either shuffle down the slide yourself, or the jumpmasters will give you a friendly push to get you started. You slide down the slide, and then you drop into oblivion.
The height of the jump is 109 meters with a 60 meter freefall, before you hit the 200 meter swing arc toward the other side of the canyon wall ( you don’t come close at all to hitting it). The setup of the swing is in a beautiful canyon overlooking the Kawarau River (at a different part than the Kawarau bungy).
I only felt a tiny bit of nerves on this go around. I chose the slide, because I wanted something that took the conscious decision to jump from my head and gave me a little forward momentum to get me off the platform. The swing is a very smooth ride. I absolutely felt the first couple seconds of freefall (I even screamed a little), but the transition into the actual swing portion of the ride is very smooth and gentle.
I was able to enjoy the beautiful canyon view around me and the river below me as I was winched up in a sitting position to the platform. Another activity conquered, and the fear factor was significantly less for me as I did more of them. Which is sort of the point. I don’t want to feel the fear. I just want to feel the adrenaline rush. But I’ve started to wonder if I have plateaued for adrenaline sports. There is no outright terror, because I’ve reached a comfortable level with the amount and type of adrenaline sports I’ve chosen. My biggest regret was not electing to do a second canyon swing (the cost is only a fraction of the cost of one swing) that challenged my fear factor. I should have done one that was backwards or head first or some other crazy stunt. But I didn’t.
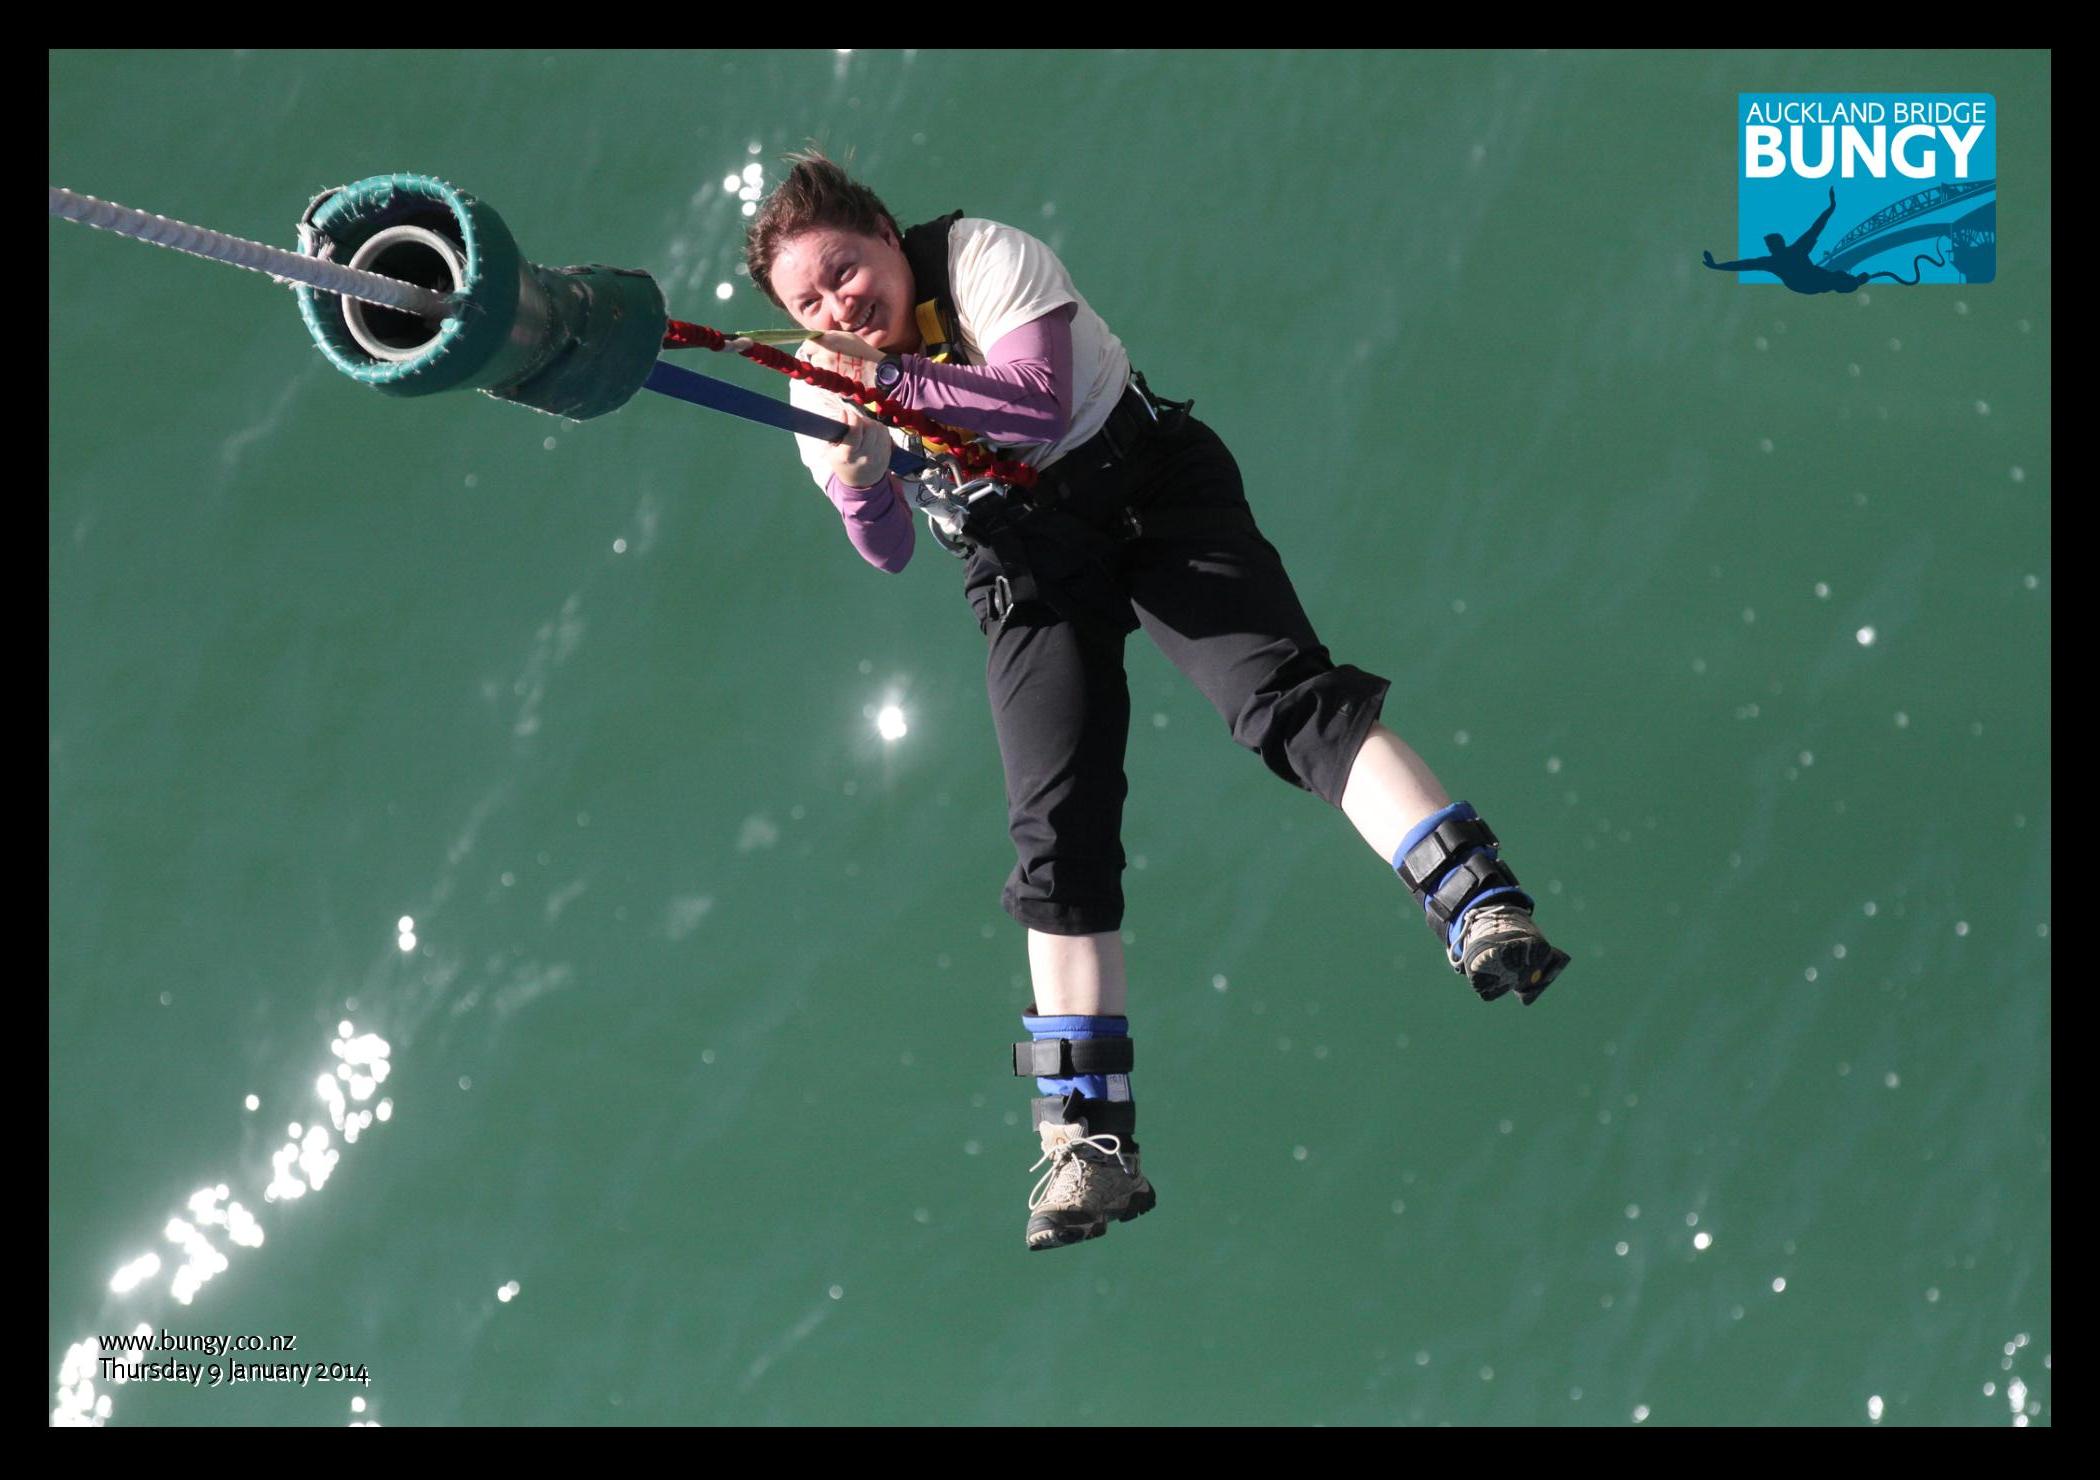
So I completed the bungy jump quadfecta of AJ Hackett bungy jumps in New Zealand with the Auckland Bridge bungy jump. The setup for this jump is similar to Kawarau. It’s on a bridge over water, though this body of water is ocean near the Auckland Harbor and not a river. This jump is only 40 meters, so it is a tiny bit less than the Kawarau jump. I’ve seen this jump done before when I did the Auckland Bridge Climb my last trip to New Zealand, but I was too nervous to try it myself. But now I launch myself off stuff fairly easily now, at least in the forward dive position. I don’t feel the fear, just the adrenaline pumping through my body from excitement. You don’t stand on the platform long enough to second guess yourself, unless you actively give in to the fear. You just shut the part of your brain off that tells you jumping off stuff is a bad thing, and just go with it.
The jumpmasters hooked me up quickly, but safely and professionally. They got me into position, took my picture, and then gave me the countdown. And then I was off, diving out as far as I could over the Auckland Harbor.
And again, I watched the water rushing toward me, but even though I had requested an ocean touch, the water level was too low for me to hit it. I always dive with my eyes open, so I have a full view of the water rushing toward me. I even rarely scream for whatever reason. There is a always a slight moment of doubt when I first feel the bungy cords tug at my ankles, but they always hold. I enjoyed a few bounces over the Auckland Harbor before preparing for the ascent.
This particular jump had a similar finish as the Nevis jump in that that I tugged a cord that released my feet, so I was winched up to the launch point in a sitting position.
Again, a shot of adrenaline was a GREAT way to start the morning, way better than caffeine (though it is a tad more expensive than Starbucks).
I fulfilled all my adrenaline goals while I was in New Zealand, and now I’m eager to try more and different experiences. If you want to challenge your fear factor in a safe manner, and have one of the best rushes in the world, take advantage of all that New Zealand has to offer.